
When we first opened the shop we new that we wanted to bring neighbors and friends closer together. We had no idea how crafty those neighbors and friends would be. We also had no idea how giving and selfless the people of this community are. I was thrilled that our shop could be a part of the Love Rock movement, and I am really excited to take another big step in crafting for others. Today is the first meeting of The Crafty Heart Club. This is a free crafting club, with the purpose of giving our handmade items to a local or international organization that is in need. The club meets to craft together every Tuesday from 6:30 to 8:30, and for those of you who want to contribute but cannot attend meetings, we’ll post our project and a tutorial here on the blog. We will focus on one project per month. Our first Crafty Heart Club project is an emergency duffel bag for The Foster Closet in Hillsboro, Oregon.
The Foster Closet is run entirely on donations and by volunteers, with the goal of providing clothing and necessities for free to foster children and parents. Typically foster children use trash bags to carry their belongings from place to place, and The Foster Closet has created an emergency bag program to lift children’s self esteem a bit during an already difficult time. They keep handmade emergency duffel bags in the shop, and also pre-pack bags for those times when children are transported with no clothing at all. Our goal this month is to make as many duffel bags as we can. Let’s go!

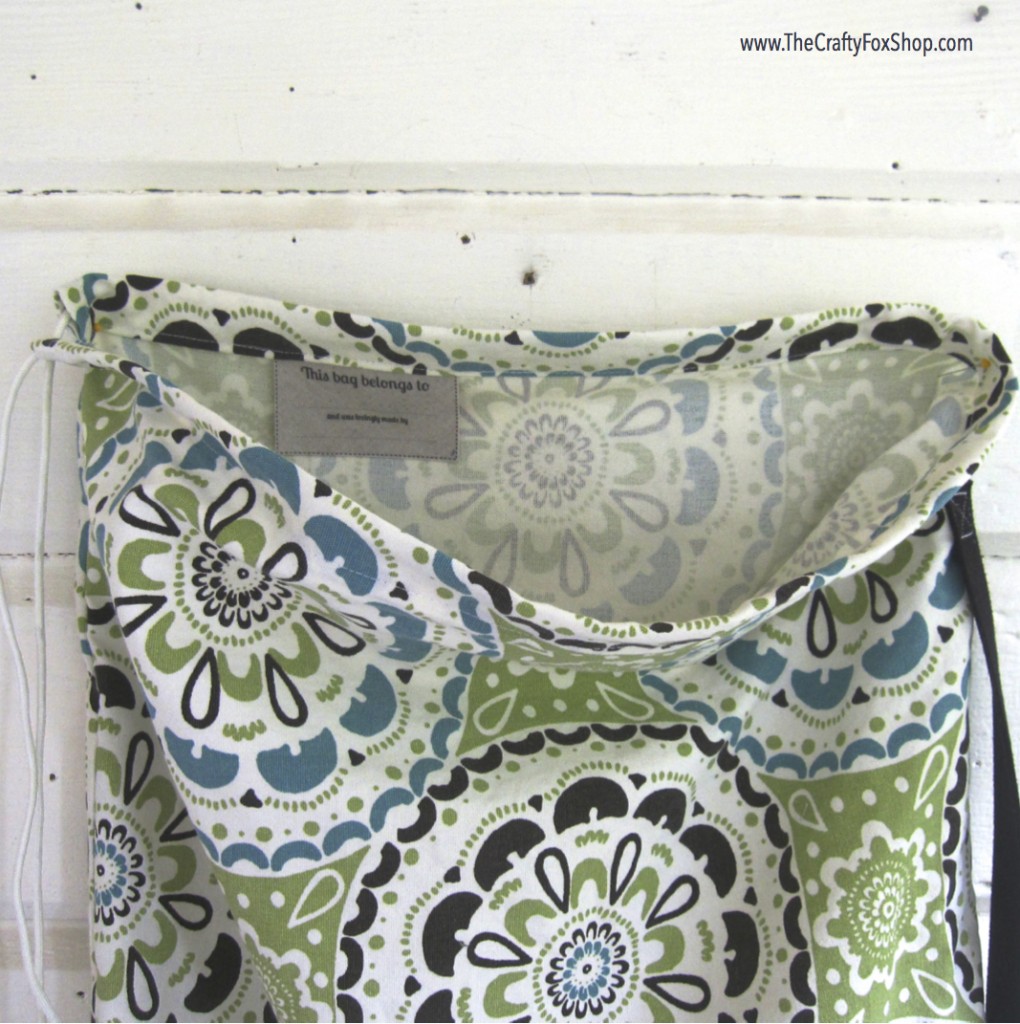
There is a great tutorial posted here. As soon as I found the tutorial I knew I had to make one, even though it was 11 o’clock at night. And you know what? It was super simple to make. As soon as you’ve made one you will definitely want to make more. A note about fabric choices: I made my sample from a thrifted Target shower curtain. Fabric store quilting cotton is usually $5-10 per yard, which would get you one bag. My super cute, super sturdy cotton shower curtain was $6.99 and came with enough fabric to make 3 bags!! Keep your eyes open and think outside the box when it comes to fabric!
Materials
– 1 yard of fabric (my sample is made from a thrifted Target shower curtain!)
– 2 yards cord
– 1″ cotton webbing (optional)
That’s it!
Step 1.
Cut your fabric into a rectangle that’s 36″ x 40″. If you are using fabric from the bolt you’ll probably lose a bit in the wash, and trim off a bit from the selvedge. Add the strap: The simplest method is to use cotton webbing, centered, and stitched into boxes with Xs at either end. You can also cut a 3.5″ x 18″ strip of fabric, fold right sides together, stitch, turned inside out, and top stitched to make a strap. This is a personal preference, so I didn’t include too much detail here. See Amy’s tutorial for more ideas.
Step 2.
At the top of the 36″, mark a point 3″ down from the top, and draw a rectangle 1″ wide. Snip with scissors in to the corner mark. Repeat for the opposite side. This will be used to create a drawstring casing.

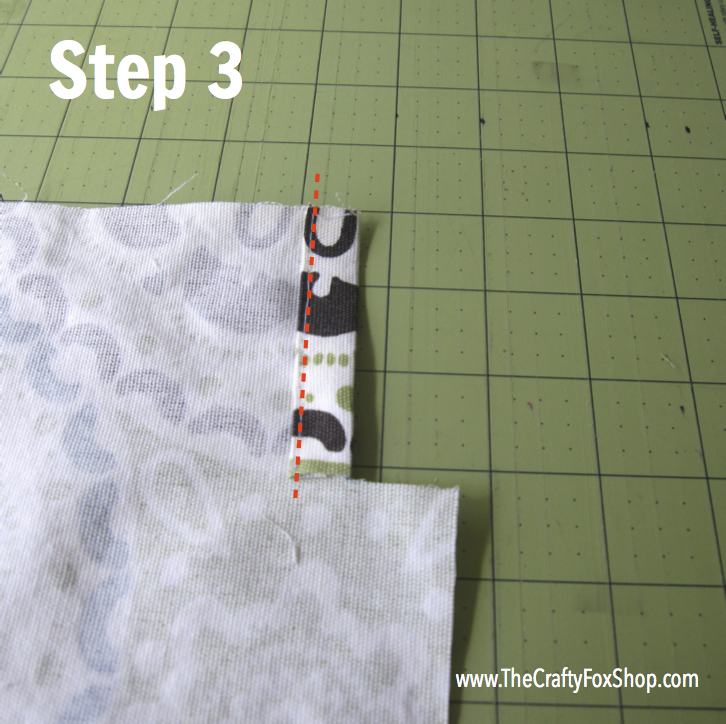
Step 3.
Fold the sides of your casing in so that the raw edge is tucked inside and the folded edge is lined up with the cut in the fabric. Press with an iron, pin, and stitch down. Press your seams. Repeat for the other side.
Step 4.
Fold the top edge down to the cut in the fabric. Press with an iron. Tuck the raw edge under so that it touches the fold you just pressed, and press again. Pin in place and stitch closed with the seam 1/8″ from the tuck-under fold. This is your casing. * If you are adding a tag, as I did, you’ll want to insert it before stitching the seam. Stay tuned for a diy tag tutorial.

Step 5.
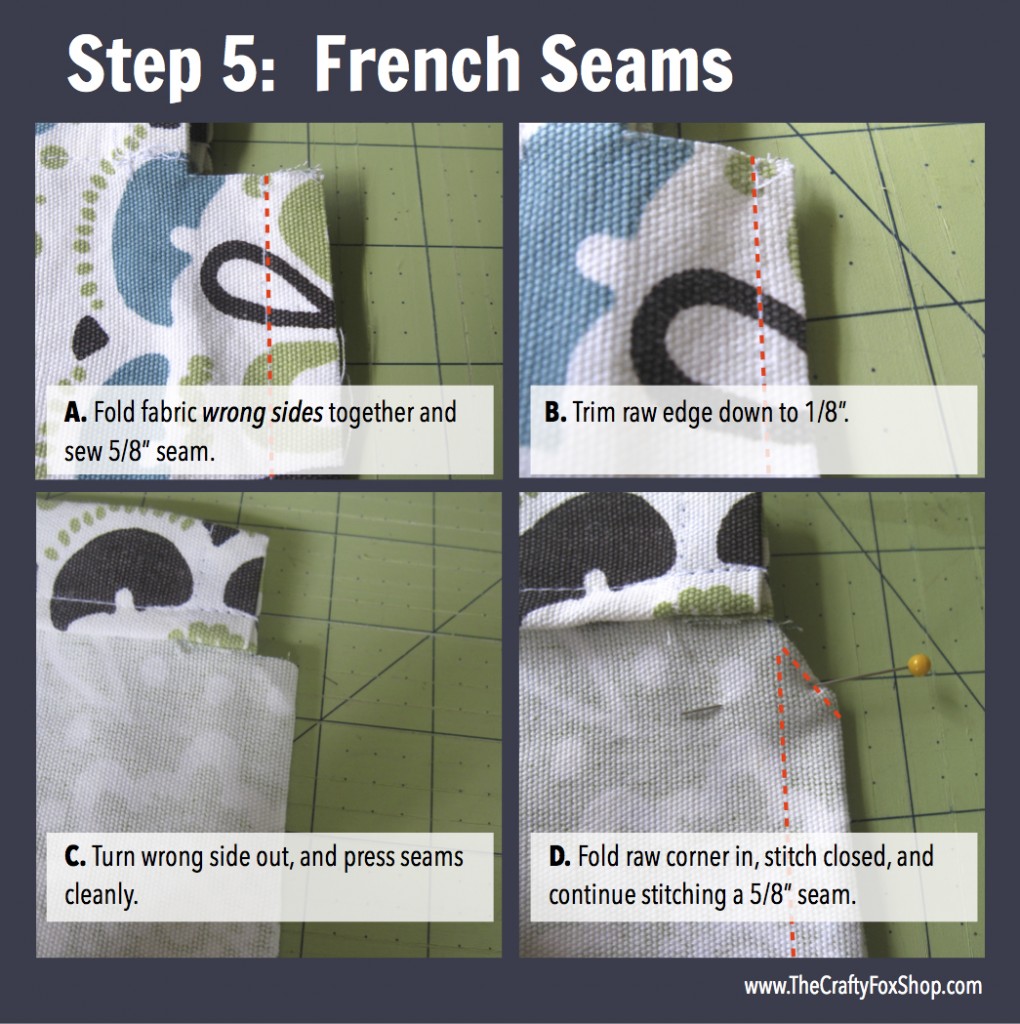
We want the kids bags to be quality items, so I’ve opted for french seams here. These are so simple to do and so darn sturdy.
– Fold the bag in half, wrong sides together, and sew shut. You’ll be sewing an L shape. Press your seams with an iron.
– Cut excess fabric, leaving about 1/8″ on the side of the seam. Be careful not to cut too close to the seam or the fabric will unravel.
– Turn the bag wrong side out and press the seams nice and clean. To close up that top edge of the snipped fabric you can either zig zag stitch, or tuck the raw edge in and stitch it shut. Now you can sew your second seam, with a regular 5/8″ seam, and this creates a french seam. So easy!
Step 6.
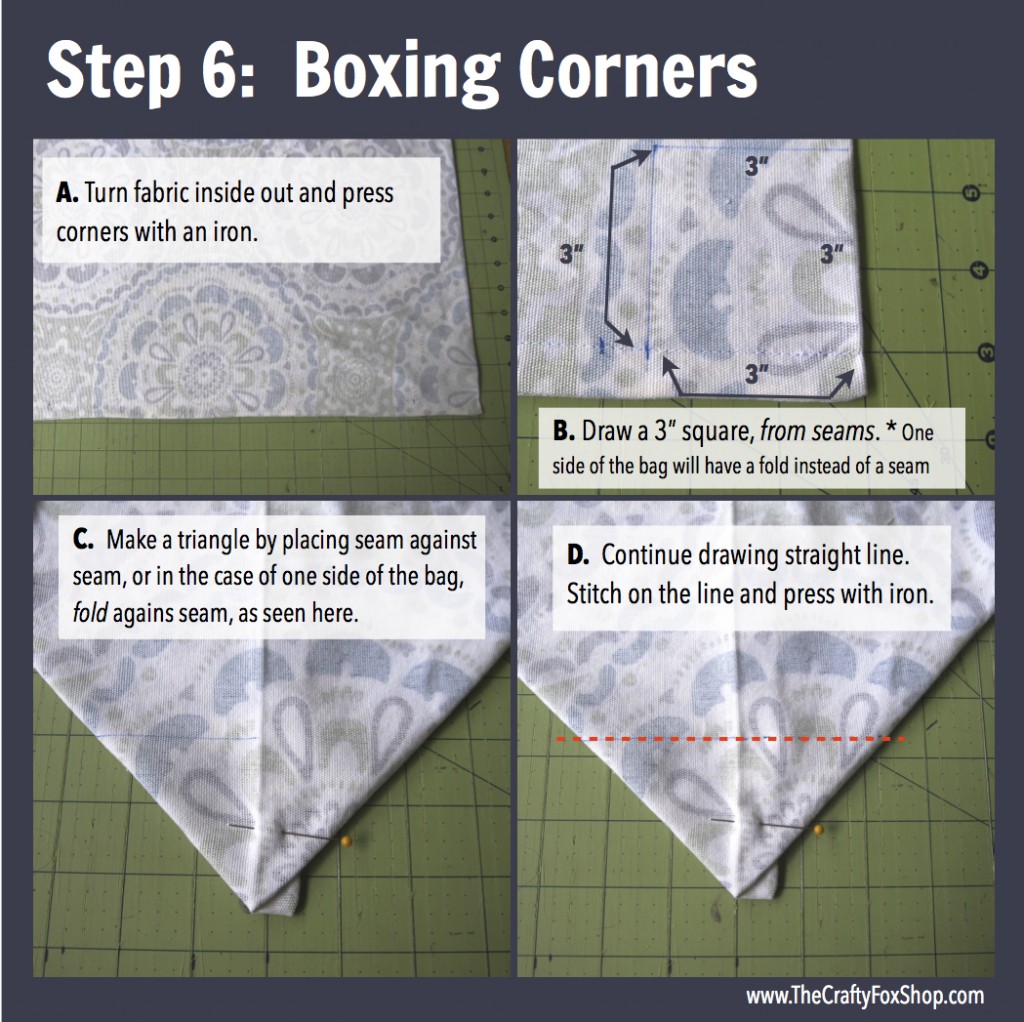
Boxing the corners. With the fabric inside out, press the corners with an iron. Draw a 3″ square at both corners. The 3″ will be from the seam (One side will simply be an iron fold because we’ve only stitched up one side of the rectangle). Make a triangle with one corner by placing the seams together. Continue to draw the straight line that you previously made. Stitch directly on this line, and make sure to back stitch. Press your seam and turn the bag inside out. Do not cut these triangles as they’ll provide extra shape and support for the bag
Step 7.
Use a safety pin to pull cord through the bag and knot closed. All done!!!
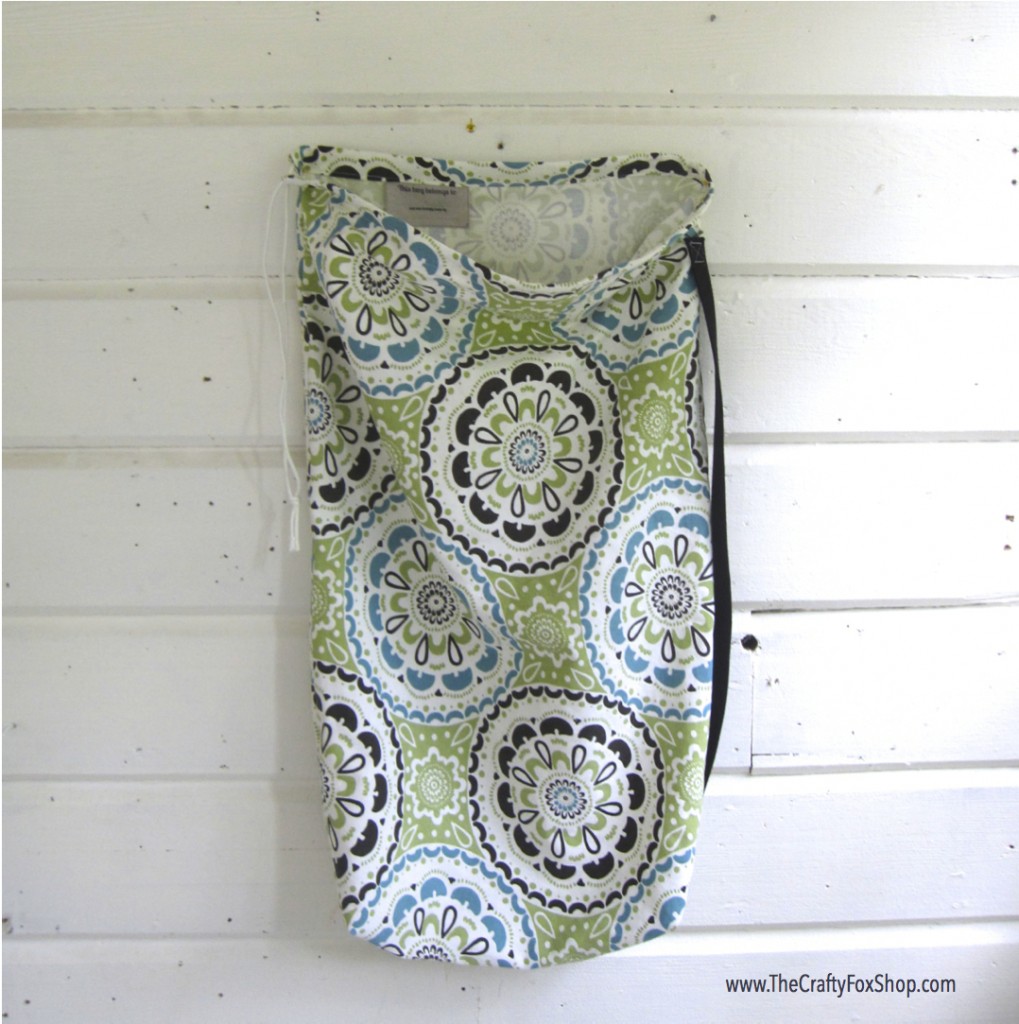
And there you have it! Once you’ve made the first bag you can easily make more in 20 minutes or less!! So if you’d like an in-person tutorial, come on down to The Crafty Heart Club any Tuesday in August from 6:30 to 8:30. Bring some fabric and your sewing machine. We are located at 2013 Pacific Ave. in Forest Grove, right next to OK Floral and across the street from Frye’s Athletics. We will collect bags through the end of August, but you are welcome to make them any time of year.